Suspicious application consuming bandwidth on PC? Learn how to find out what it is!
One must have tool is a way to show your real time bandwidth usage, be that on Windows, Linux or Mac or whatever, consider this scenario: you are using your machine normally and you feel that your internet is slow for some reason or other household members are complaining that the internet is slow, is there a way to find out if that bandwidth is really being used somewhere or it’s your ISP having a hard time? Read on to find how!
Needed tools (both free):
1)Wireshark packet capture from www.wireshark.org, to capture the network traffic to and from your machine
2)Networx Bandwidth Monitor from https://www.softperfect.com/products/networx , to show which bandwidth usage real time
After installing Networx Bandwidth Monitor, you should be seeing a new addition to your taskbar (if you configure it so which is highly recommended to have at all times), the rectangle with the D/U below shows you your bandwidth usage real time… of course as you might have guessed D is for Download and U is for Upload
Now if you are idling your machine or browsing or downloading or whatever, then you can expect to see some traffic relevant to the kind of activity you are doing, but what if you are doing ABSOLUTELY NOTHING and then you spot a lot of traffic going on, like in my case below:

I was downloading @ 792 Kbytes/sec when i just logged into my machine, so what kind of application was downloading all that at this speed and lasted for a very long time (5 minutes)?
In order to simply find that out just launch Wireshark! Wireshark is a “Packet Capture” application, for those who are unfamiliar with networking concepts, what it simply does is taking a copy of all the network data passing from and to your machine, Wireshark is used by a lot of network experts to troubleshoot network issues but you don’t need to be a network expert today to follow this guide, it’s pretty simple 🙂

When you open Wireshark you will see the screen prompting you to choose which interface to capture traffic on, a network interface is simply the network card or wifi adapter on your machine, so if you are connected via wifi to your home network then you should choose Wi-Fi, also something small but handy is that Wireshark shows real time the traffic on the different interfaces so you can find out which one is currently active and using traffic, see those small “graphs” next to the available interfaces?
In my case, as you can see clearly there is a lot of traffic going on on the Wi-Fi adapter, that’s where we want to capture the traffic so we go ahead and click on “Wi-Fi” to see the magic happen!
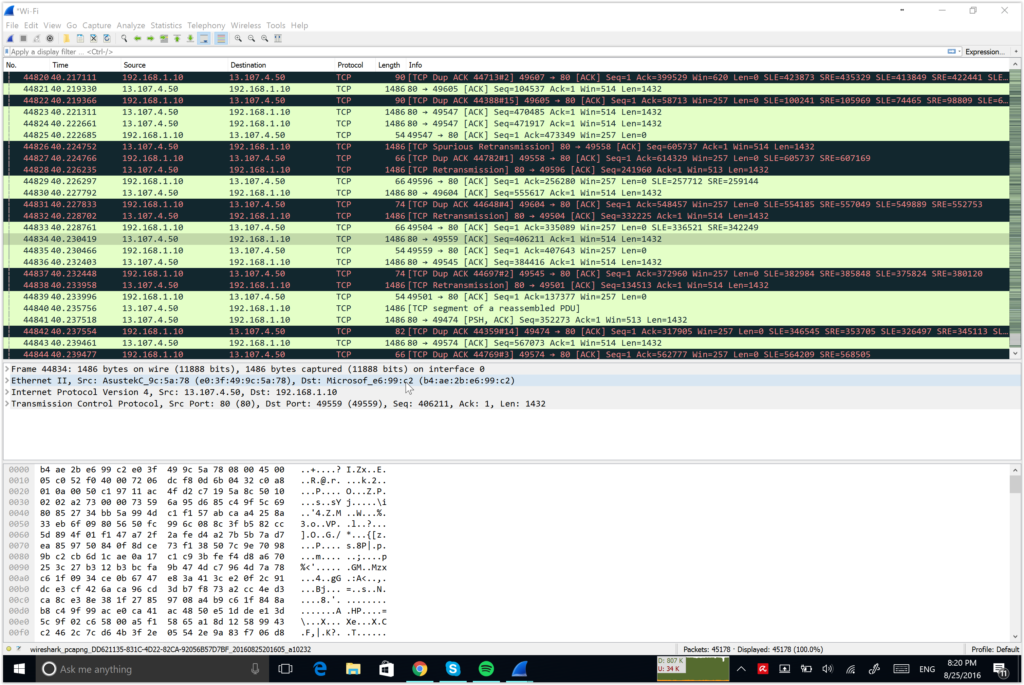
Once you click on the adapter you will see a screen scrolling pretty fast containing all the captured network data that looks like below:

Leave Wireshark running for a minute or two to capture enough traffic for our analysis then click on “Statistics > Conversations” as shown below, here we can see all the traffic that was captured and we can do what we ultimately want : Sorting the traffic by volume to see exactly which network “conversation” is using this much traffic…

Statistics > Conversations
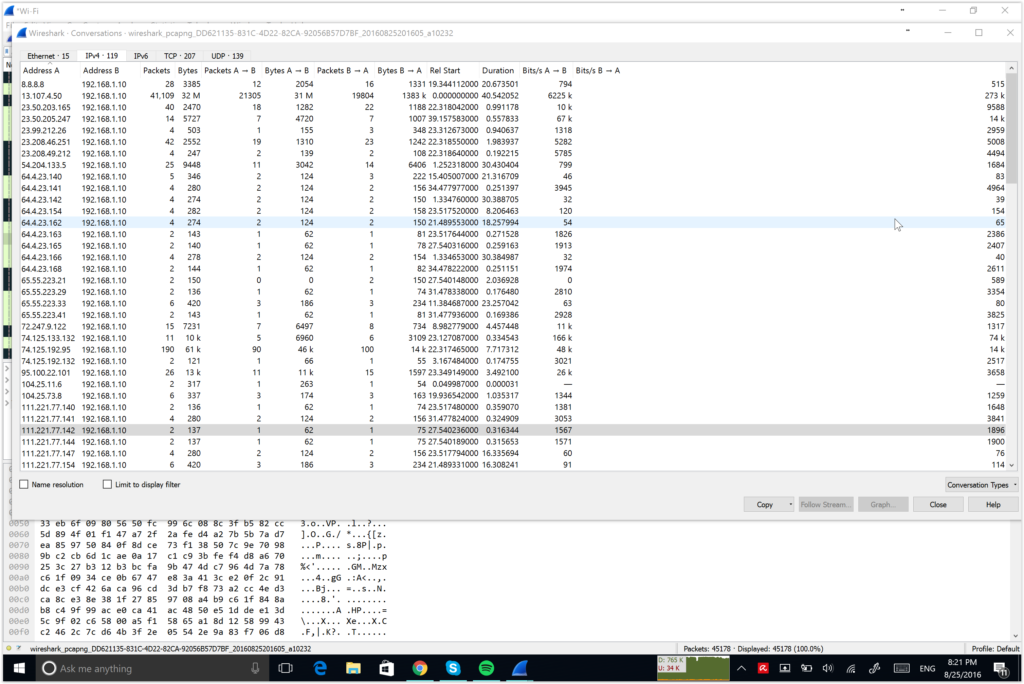
Click on IPv4 tab, then click on the Bytes column, in my case after i sorted the traffic by volume i could see the largest traffic volume was between two IPs 192.168.1.10 & 13.107.4.50, 192.168.1.10 is my private IP on my home network, if you are unfamiliar with the diffence between a private IP and a public IP there is no need to worry about that right now, simply you can find out your private IP from “Start > cmd > then typing ipconfig /all, anyhow now that we have the IP address we want to investigate, a simple search on google for “IP whois” shows a lot of sites that can provide you the identity of the IP address, in my case i chose www.whatismyip.com/ip-whois-lookup/,

Conversations Window
Provide the IP address and voilà! This is a Microsoft address so all that traffic must be Windows Updates! Thanks Microsoft for the updates!
I hope this was helpful! Any questions? Let me know and i will answer them as soon as i can!